Image SEO Best Practices for Blog and Social Posts
Image SEO best practices for blog and social graphics: filenames people search, alt text that states the words, WebP exports and Open Graph link previews.
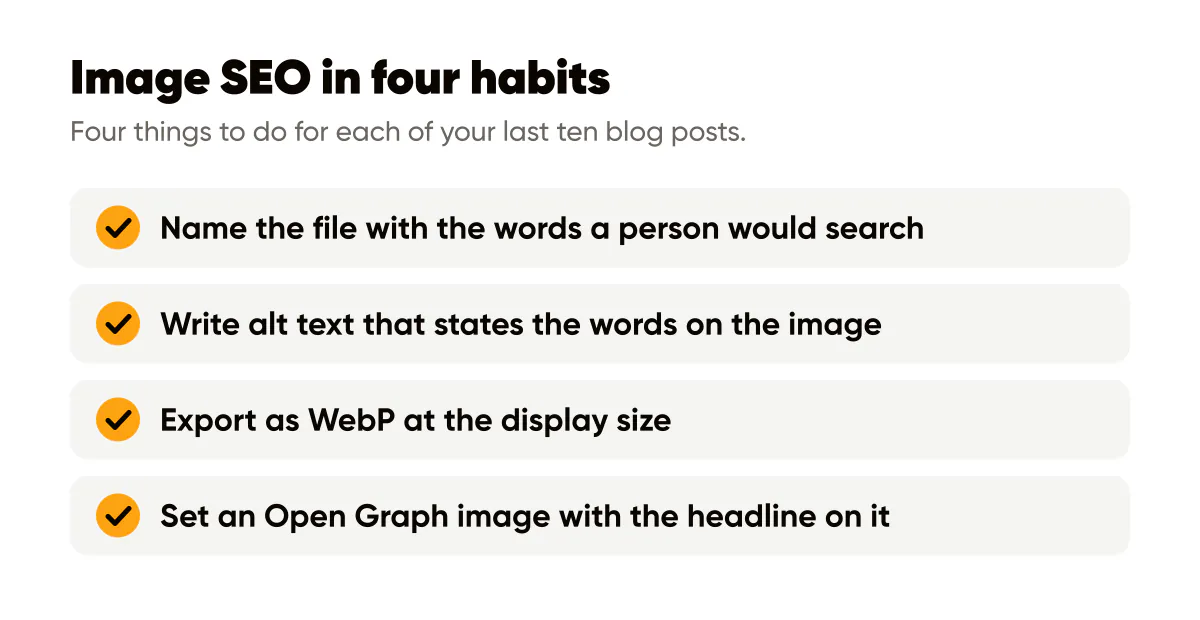
Image SEO for a solopreneur comes down to four habits: name the file with the words a person would search, write alt text that states what the image says, export as WebP at the display size so the page loads fast, and set an Open Graph image so every shared link shows your branded graphic.
Why image SEO matters for graphics you already make
Every branded 4:5 post you export is also a potential blog image, a link preview and a Google Images result. Most of that value gets thrown away by a filename like IMG4821.png, no alt text, and a 3 MB PNG that slows the page down. None of the fixes take more than a minute, and they compound across every image you ever publish.
Google's image SEO best practices are the primary source here, and they are refreshingly plain: use descriptive filenames and alt text, put images near relevant text, use responsive sizes, and make sure the images are crawlable. Everything below is those rules translated for someone whose images are mostly text on a branded background.
What should you name an image file?
Say what the image is, in the words a person would type, with hyphens between words and no spaces or capitals. "instagram-post-size-4-5-cheat-sheet.webp" tells a search engine and a human what the picture is. "final-v3-copy.png" tells nobody anything.
My habit: the filename matches the headline on the image, shortened to three to six words, plus a hint of the kind of graphic if that helps ("-checklist", "-comparison"). Because I batch graphics with the headline written before the image exists, I can name files at export time without thinking. Keep a consistent pattern and it takes no effort at all.
Alt text for text-on-image graphics
Alt text has two audiences: people using screen readers, who need to know what the image conveys, and search systems, which read it as a description. For a branded text post, both audiences want the same thing: the words on the image.
Write alt text that states the text and, briefly, the setting. "Branded graphic on an amber background reading Stop posting daily, start posting on purpose." That is it. Do not write "image of a post" or stuff keywords that are not on the image. If the image is purely decorative, a background swirl with no words, the alt can be empty so screen readers skip it.
Is alt text the same on a blog and on Instagram?
The principle is the same, the mechanics differ. On your blog the alt attribute lives in the HTML and is read by Google. On Instagram you add custom alt text in advanced settings before posting, and Instagram's search reads it. The same sentence works in both places, and writing it once at export time means you never skip it in either. The Instagram side, including what to say when the image has no words, is in Instagram alt text and accessibility.
One trap: text on an image is invisible to search unless it also appears as real text nearby. Google reads the alt and the surrounding paragraph, not the pixels reliably. So the headline on the graphic should appear in the alt text and in the caption or the article body. That is the same reason keywords in captions matter for SEO for social posts.
WebP, JPEG or PNG
For a blog, export WebP. Google's WebP page describes it as a format that produces smaller files than JPEG and PNG at similar quality, with support for both lossy and lossless compression and transparency. In practice, my branded covers come out at a fraction of their PNG size as WebP with no visible difference on the page. Every cover image on this blog is a WebP file for that reason.
When does each format still make sense?
- WebP: the default for anything on your website. Smaller files, wide browser support, handles flat color and photos.
- PNG: only when you need lossless quality for a master file or transparency in a tool that does not accept WebP. Keep the PNG as your source; publish the WebP.
- JPEG: photos on platforms that do not accept WebP, or when a tool recompresses the upload anyway. Social platforms re-encode whatever you give them, so upload a high-quality JPEG or PNG there and do not worry about WebP.
AVIF is smaller still, but support in the everyday tools solopreneurs use is less universal, so I have not switched. WebP is the sensible default until that changes.
Dimensions and file size for speed
The largest image at the top of a page is usually the element that decides how fast the page feels. web.dev's explainer on Largest Contentful Paint covers why: the browser paints the biggest visible element, and if that is a 3 MB hero image, the page feels slow no matter how fast the server is.
Two rules handle most of it. Export at the size the image is displayed, not the size the canvas was designed at; a 1080-wide graphic shown in a 720-wide column does not need 1080 pixels unless you serve a smaller version for smaller screens. And keep blog images under a few hundred kilobytes; for a flat branded graphic in WebP that is easy, and for a photo background it means a modest quality setting. If your platform supports responsive images (most do), upload the full size and let it generate the smaller variants.
For the blog version of a social graphic, keep the 4:5 ratio and the same file, resized. A 1080 by 1350 graphic works as an inline image in an article, and it works as a Pinterest pin, which is one reason I standardize on that ratio everywhere. It is also the size every post from our Instagram post generator comes out at. For the article's cover image, I use a wider frame, because link previews are landscape; that is the Open Graph question below. The full list of sizes per surface is in the Instagram post size cheat sheet.
Open Graph images for link previews
When someone shares your page on LinkedIn, Facebook, Slack or in a message, the preview card pulls its image from an Open Graph tag on the page. The Open Graph protocol defines those tags; your site platform almost certainly has a field for the "social image" or "featured image" that fills them in.
Set it on every page, and make it a branded graphic with the page's headline in large type, your logo, and your brand color. Landscape works best for the card format most platforms use; a wide crop of the same design as your 4:5 post is the least work. A page with no Open Graph image gets a gray box or a random image from the body, and people scroll past gray boxes. Every share is a free branded impression if you set this once.
Do this this week
Go through your last ten blog posts and do four things to each: rename any image with a meaningless filename, write alt text that states the words on the image, replace PNG and JPEG images with WebP versions exported at display size, and set an Open Graph image with the headline on it. Then change your export habit going forward so every new graphic leaves your tool with a descriptive filename and a sentence of alt text already written. The reason to bother with all of this is the same reason to have a blog at all, which is the argument in blog or social first: the version you own should be the one that is findable.
Put it into practice
Turn this into posts designed for your feed
Paste your website or say what you do. Creobee plans, writes and designs your posts about it as one feed in your logo and colors, captions included, and on Autopilot it posts them for you.
How the AI social media post generator works